Thursday, December 27, 2012

Turn a normal webcam into a IR webcam

The CMOS sensors in digital cameras like webcams are actually so sensitive that they can detect IR radiation as well as reular light. Well, they cant sense the whole infrared spectrum, so it's not usable as a heat sensing camera. But it will pick up the IR light given off from remote controls and other IR LED's.

However, since humans cant see infrared we dont really want our cameras to pick up on it either, as it dont make sense to show it on a screen, when it's not really how the image looks (with eyes).
So all cameras have in them a IR filter. A piece of glass that dont let infrared light thru.
And so by opening up your webcam and gently taking the filter you have suddently got a IR camera.

I started with my Microsoft VX-800:
And started disasembling it:
Then find the optical sensor and lens inside the camera. Then unscrew the lens:
Webcam with the lens removed, revealing the photosensitive sensor. 

The lens, the blue dish on the right is the IR filter
On the underside of the lens there is a small glass dish that has a tint. This is the IR filter. Carefully remove it with a knife, and then screw the lens back on and reassemble the camera. Don't throw the IR filter away, as you might want to put it back at some point.

I have not been able to come up with any really good uses for my IR camera. The IR LED i use cant really
illuminate things that are more than a few feet away, and i have to carry my laptop around with the hideous
ducktape hanging on it. And since the camera dont get much light it puts out a real slushy video.
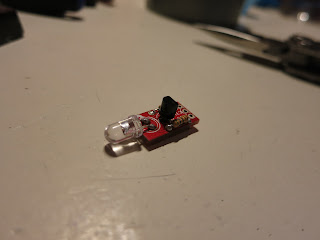
PCB with IR LED from sparkfun.com 

And with the IR filter gone all the colors are wrong. Plants look white, my black fleece sweater is now grey, nothing has any clear color anymore, every color gets it's own shade of gray to it.

I also tried hacking open my old cellphone, in the hopes of being able to make a compact night-vision rig, but
unfortunately the IR filter in phones is muh harder to get out. They have placed the filter directly on the sensors so just a slight slip with any tool will shatter the chip.
The webcam and the IR LED taped to my laptop
I didnt stand a chance disecting the camera with plyers and a leatherman knife. The phone survived, but when i start the camera it just says "camera failed".
Not what you wanna see
The CCD is really thin and fragile once you remove the packaging
Update:
So now the  VX800 can see IR light, but one side-effect is that the colors don't look right anymore:
And here is a comparison shot done with a normal, proper camera:

Wednesday, December 19, 2012

Wolfram Alpha is a cool tool

Having trouble setting things in perspective sometimes?
Wonder what each person in norway would get if facebook got divided amongst them?
But you dont really want to bother doing the math?

Check out WolframAlpha, a math centered search engine:

http://www.wolframalpha.com/input/?i=%28facebook+revenue%29+%2F+%28norway+population%29

Check free space on the Raspberry Pi from windows

So, after using the Pi for allmost a week i started to worry about runnning out of free space. With my SD card only having 4GB to start with it seemed too good to be possible that i hadnt gotten any memory problems yet.

But how do you check how much free space there is on the Pi?

Well, i manage my Pi remotely using SSH from my Windows machine.
It's nice and easy to set up, you simply enable it on the pi either in raspi-config or in the RaspBMC settings (i use raspBMC).

Then on my windows machine i have installed Bitvise SSH client. A nice free program that also includes an integrated SFTP client for transferring files. You can download it from Bitvise's site.

After connecting and using your login (the default username is: pi and default password is: raspberry). You get your terminal session.

To display used and free space for all drives on your remote system just type:
df -h

It returns like this:

Use Audacity to make wav files you can broadcast

I made a short guide here on how to use Audacity to make wav files you can broadcast with your Raspberry Pi after you made it into an FM transmitter using the last post.

First off, go download and install Audacity. It's free, and it's a great piece of audio editing software.
http://audacity.sourceforge.net/

Then open the sound file you want. In my case it's an episode of The Best Podcast In The Universe.
Now, you want to mix it down to mono, like this:


Then we need to change the sampling rate. The raspberry will play the file at 22KHz, but my clip is 32KHz, so if i leave it unchanged it will only run at roughly 2/3 the original speed. 
The sample rate is changed in the lower left corner. Set it to 22050.

Then we need to export the clip:
 Choose "other uncompressed format", then "options..." and "wav, signed 16bit signed PCM"


Then transfer the file to your raspberry Pi and start your own radio channel

Raspberry Pi as FM transmitter

Found this on the web and had to try it out:
http://www.icrobotics.co.uk/wiki/index.php/Turning_the_Raspberry_Pi_Into_an_FM_Transmitter

By oscilating one of the GPIO output pins on the Raspberry Pi at high frequency the board becomes an FM transmitter. However the oscilation is based on frequency modulation with turning the pin ON and OFF, and therefore requires alot of CPU power, and limits the output sound resolution to 6 bit or so. So you can play the starwars melody fine. Speech is ok, but noisy and music is not enjoyable.


However there are talks about enabling DMA and improving the quality. But that's something for the future.

Here is how you get it up and running:
1. Download this file:
http://www.icrobotics.co.uk/wiki/images/c/c3/Pifm.tar.gz
It's a zipped folder, containing the files you need, including a soundclip of the starwars melody for you to test with.
2. Unzip the "Pifm" folder
3. Transfer the folder to your Raspberry Pi
4. SSH into the Raspberry Pi
5. Go to your Pifm folder
cd Pifm
6. Oh btw, you need to download gcc in order to compile Pifm
sudo apt-get install gcc
7. Now that's installed. Compile pifm.c
gcc -lm -std=c99 pifm.c
This will create a compiled program called "a.out"
8. Then run the file as described in the helpfile:
Usage: program wavfile.wav [freq] [sample rate]

Where wavfile is 16 bit 22.5kHz Mono. Set wavfile to '-' to use stdin.
freq is in Mhz (default 103.3)
sample rate of wav file in Hz

So for example:
sudo ./a.out sound.wav 100.1

For those new to linux:
sudo                means "do as superuser:"

./                  means "run this file:"

a.out               is the executable

sound.wav 100.1     these are the run-parameters, telling a.out to play sound.wav and output                     it at 100.1MHz FM

If succsessfull the command prompt will not display anything, and hang untill finished playing the wav-file. You can allways exit by pressing CTRL+C.
When finished playing, the program will return
exiting

By connecting a wire to the GPIO output pin (GPIO pin 4 by default) You will get very improved range. Just the pin will transmit only about 20cm, While a 20cm wire will give you about 10 to 50meter range.

Here is the pinout, as it's not really that obvious what pin it is. The bottom row, pin four from the left.
Here we are, finished and broadcasting:

My antenna is that red and white wire, leftovers from an old pc.

Oh, btw:
The wave file (.wav) is 16 bit 44.1kHz Mono format.

Tuesday, December 18, 2012

How to set the time on your RaspberryPi from SSH

So, started off, my raspberry in the mail. Fresh out the box, loaded RaspBMC and it worked so smooth!

In the raspBMC settings dialog there is no way for you to set the system time. Just a way to change the timezone.


So after a bit of googling i found out i could do it by SSH.
Take it, im a real noob when it comes to linux. Im used to the windows world, where settings are usually placed in comfy menues or handeled by third party apps, not text strings in the command prompt.

Anyways:
sudo date --set 'Tue Dec 18 19:50:00 UTC 2012'